
Client Introduction
ClashX
ClashX is a common macOS menu-bar client where hosted profiles, profile selection, system proxy, and outbound modes are managed from the menu.
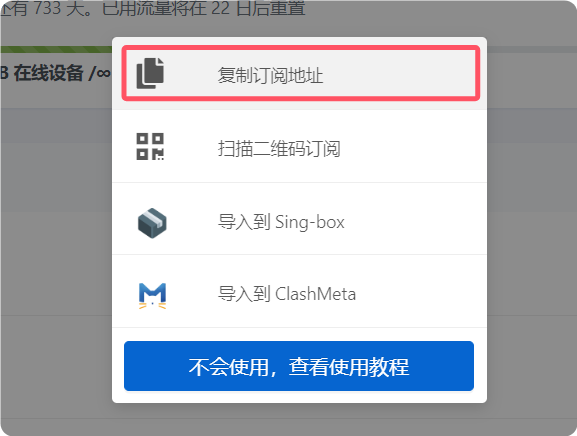
Get subscription
Copy the subscription URL from your provider. URL-based import is the recommended flow in the reference.
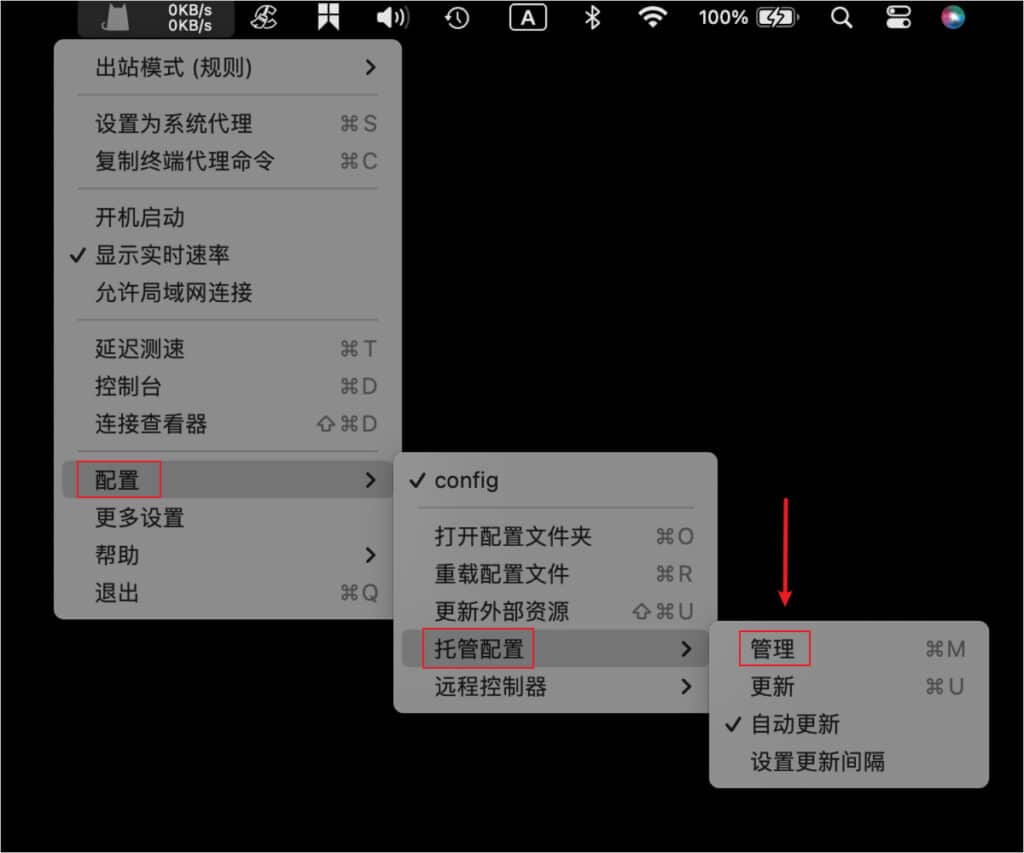
Add configuration
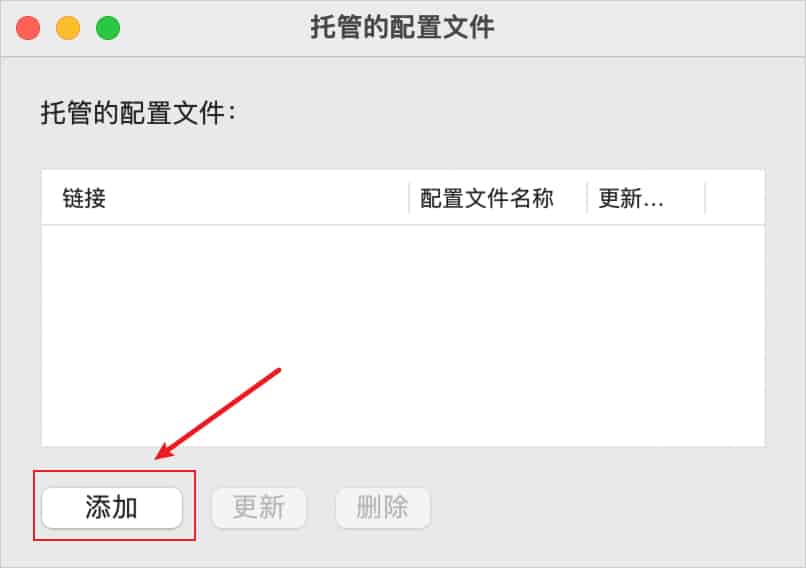
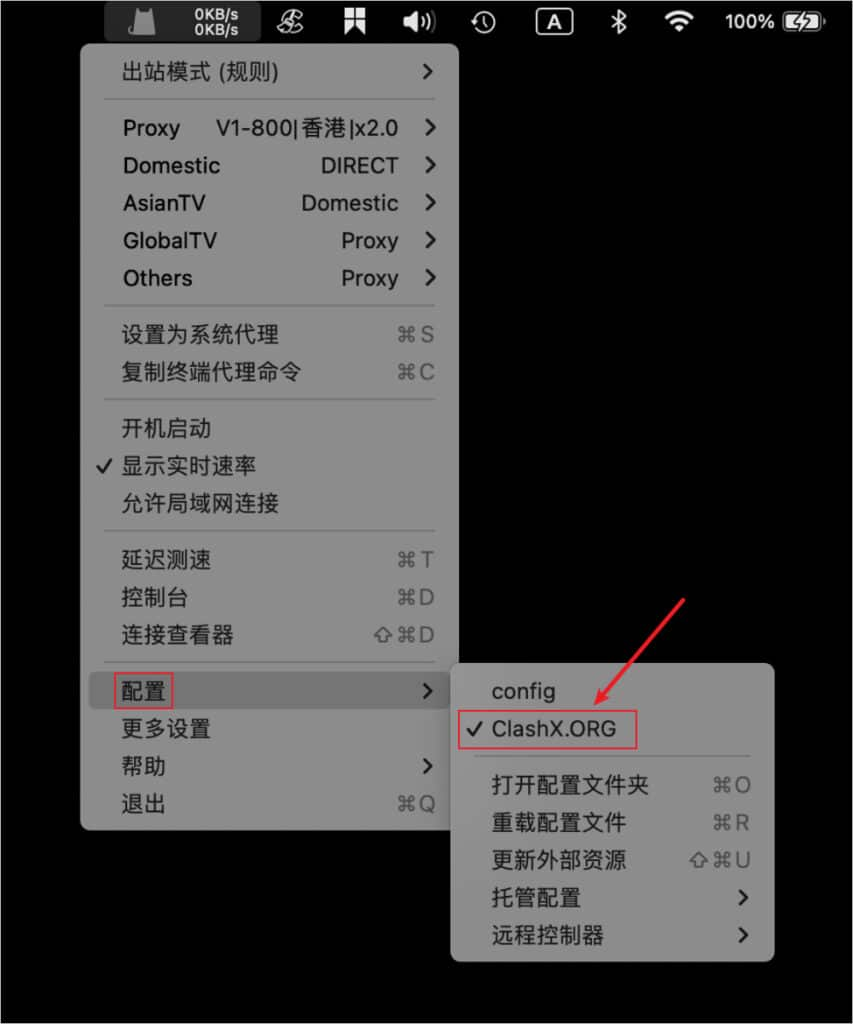
Click the ClashX icon in the menu bar and open Main menu > Config > Remote Config > Manage. In the hosted profile window, click Add, paste the subscription URL into URL, enter a name in Config Name, and confirm. Then return to Main menu > Config and select the profile you just added.

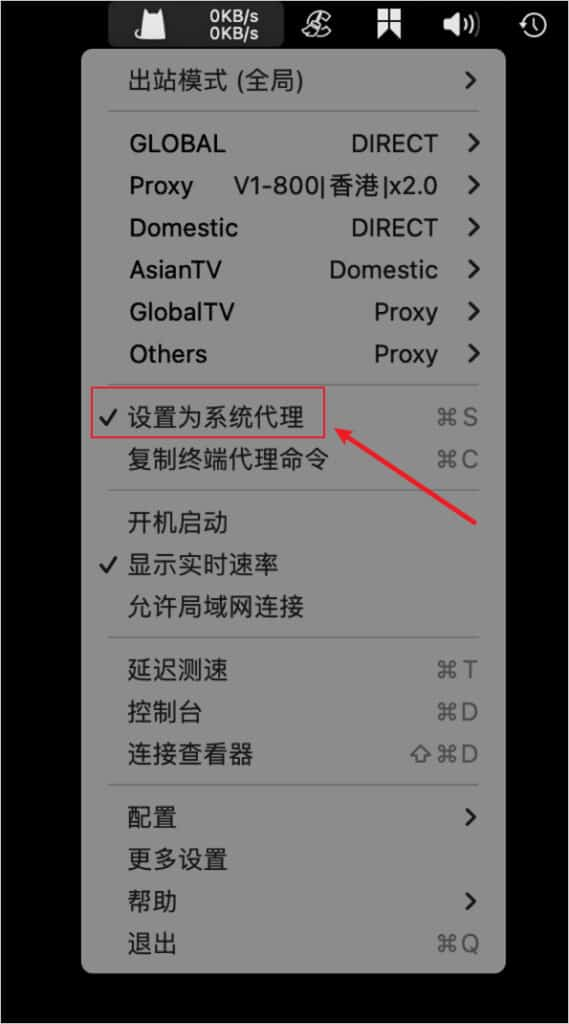
Start proxy
Choose Set as System Proxy from the menu bar menu to start proxying. The status-bar icon changes color and displays live speed after activation.
Outbound mode notes
Choose the mode from Main menu > Outbound Mode. The reference lists Global, Rule, Script, and Direct. Rule is usually the best daily choice.
- Global: proxy all requests.
- Rule: route by profile rules.
- Script: route by script rules.
- Direct: send requests directly to their destinations.