
Client Introduction
Clash Verge
This desktop Clash GUI includes language switching, subscription import, proxy-group management, and system proxy control for Windows, macOS, and Linux users.
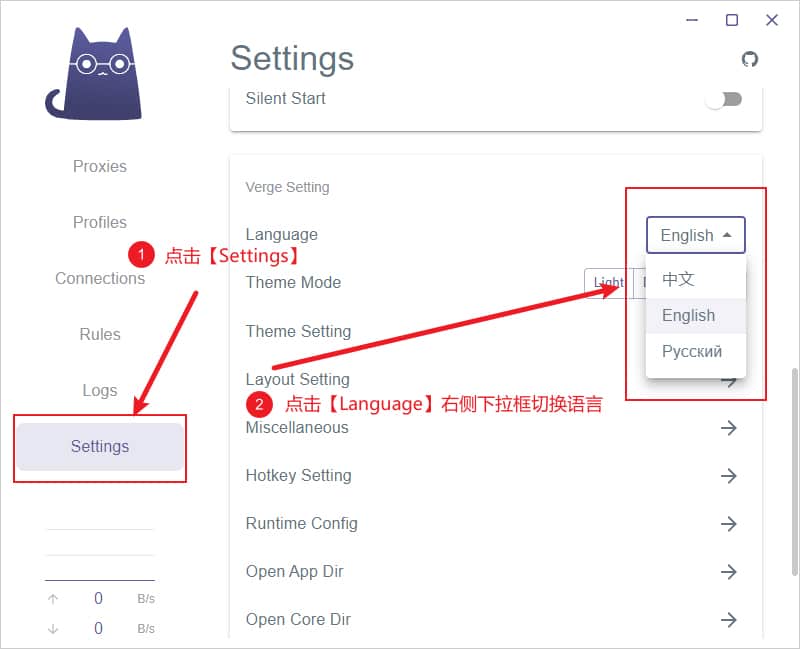
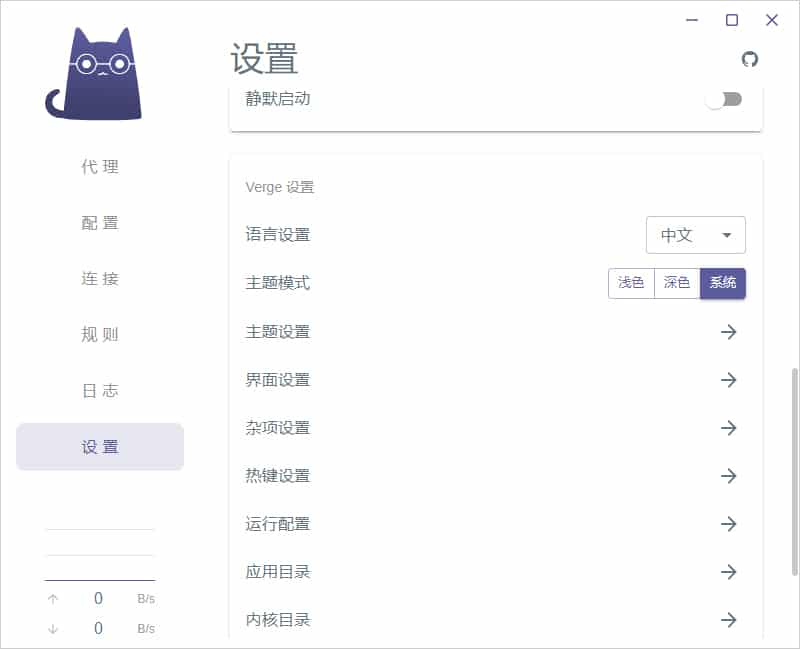
Switch language
Open Settings, find Language under Verge Setting, and switch from English to Chinese. The second screenshot shows the interface after the language change.
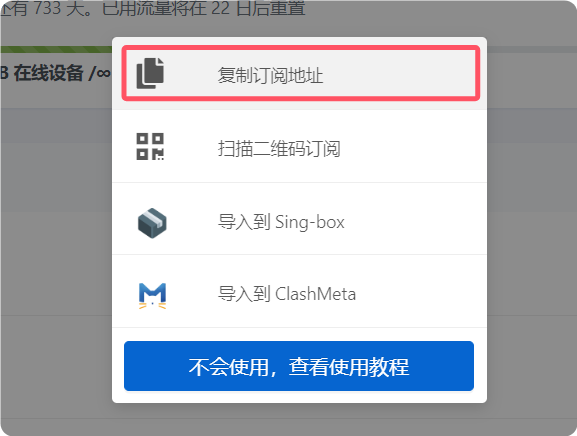
Get subscription
Copy the Clash subscription URL from your provider. URL import is the recommended method in the reference because it is easier to manage and update.
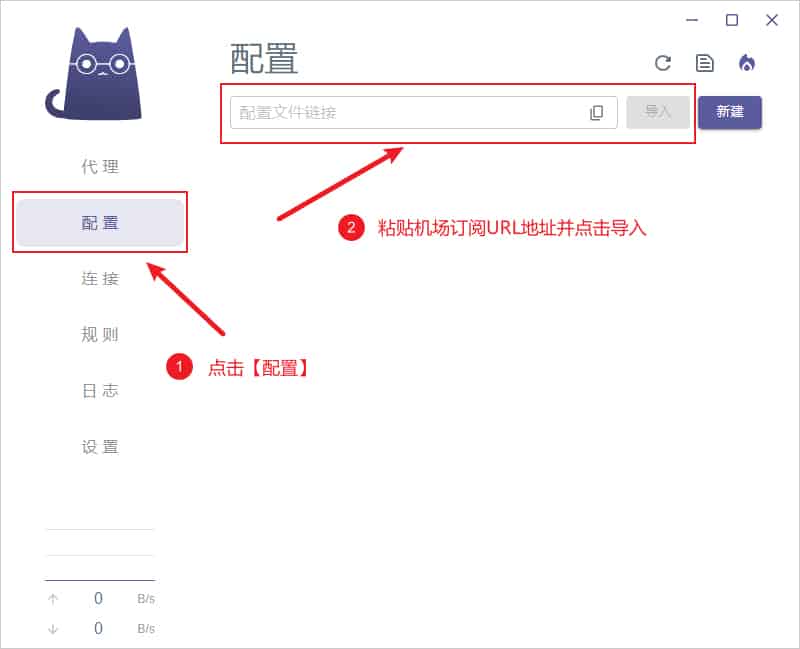
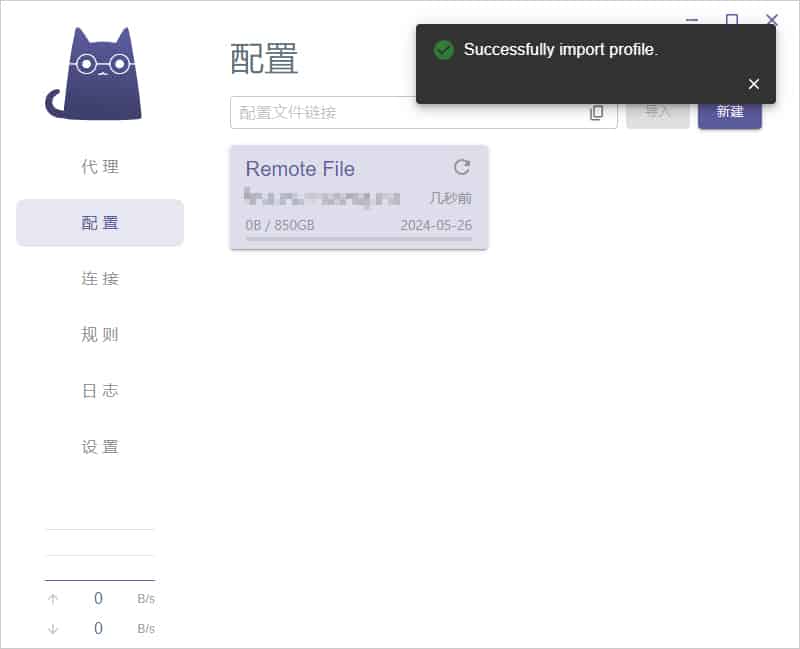
Import subscription
Open Profiles, paste the copied URL into the profile field, and click Import. When the top-right message says “Successfully import profile.”, the subscription has been imported.
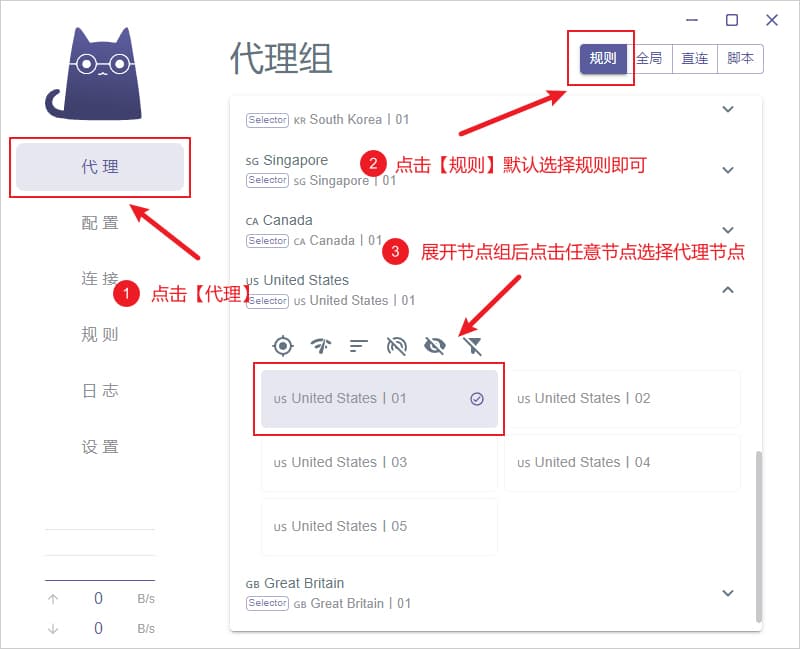
Select a node
Open the proxy group, expand the node list, and click the node you want to use.
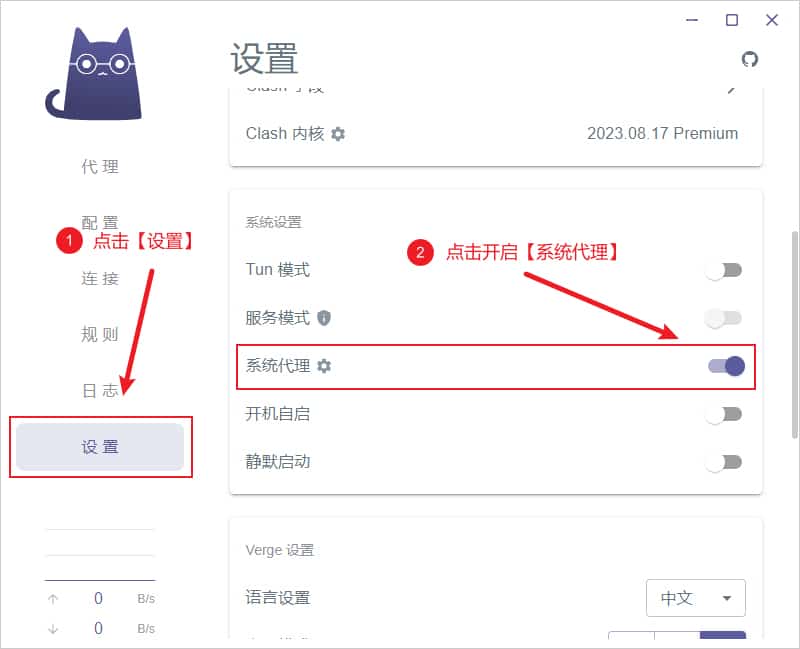
Enable proxy
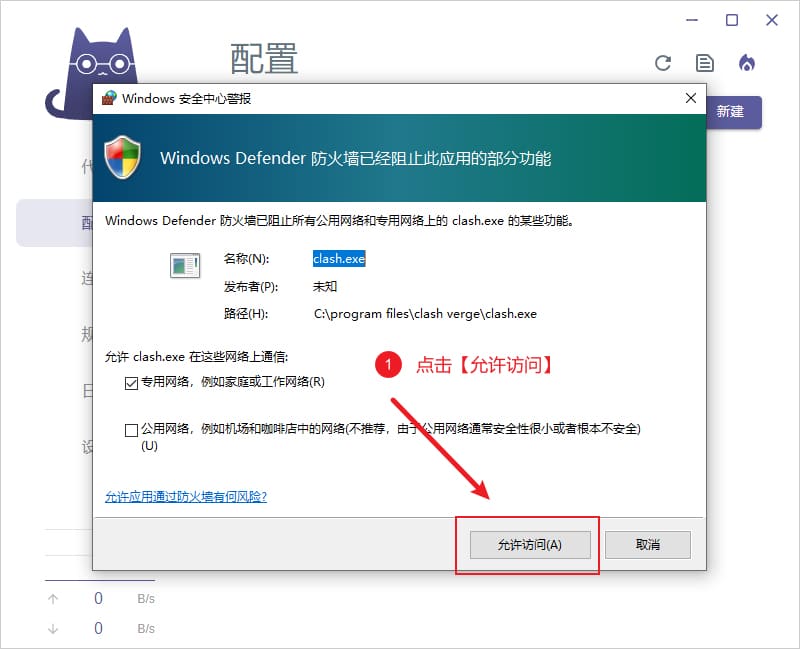
Open Settings from the left menu and turn on System Proxy. Traffic will be routed through the active Clash Verge profile. On Windows, allow access if the firewall prompt appears.
Proxy mode notes
The reference lists Rule, Global, Direct, and Script modes. For daily use, Rule is usually recommended: domestic traffic remains direct while matched overseas traffic uses the proxy, reducing latency and saving data.
- Rule: route by profile rules.
- Global: proxy all requests.
- Direct: bypass proxy for all requests.
- Script: route by script rules.